
Create and Use Automation Flows
Automation handles repetitive support work such as greetings, assignment, keyword replies, and timeout reminders.
Create a flow
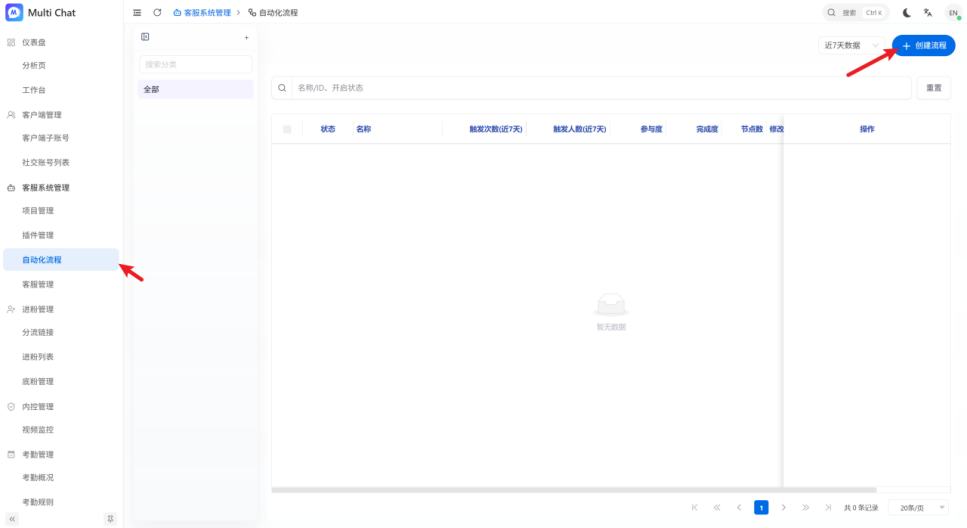
- Open “Automation”.
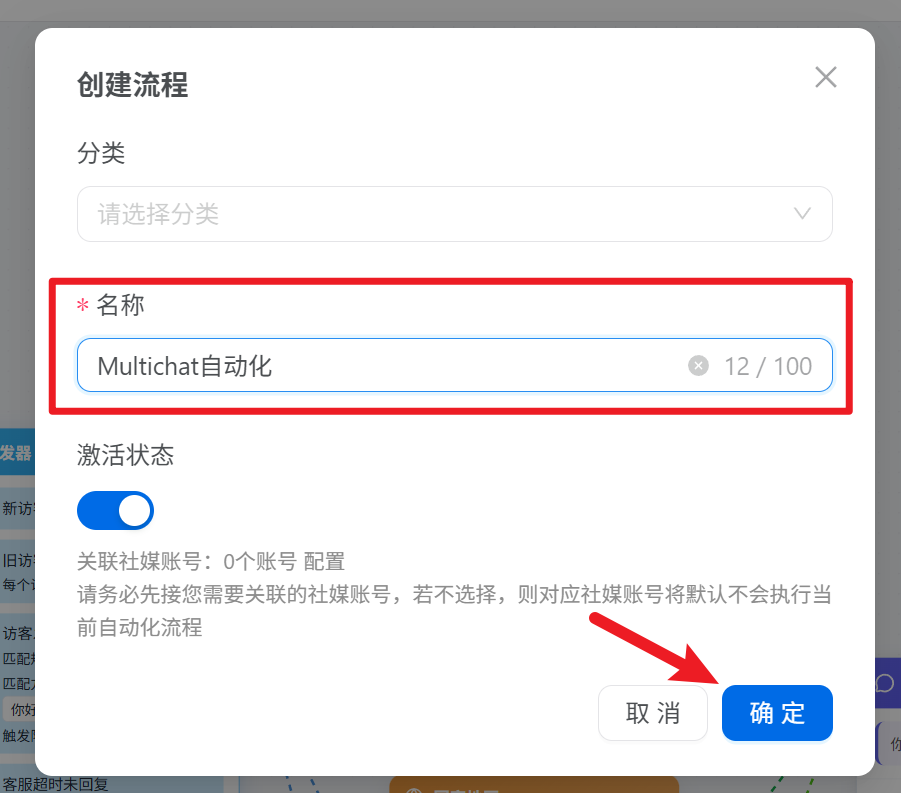
- Click “Create Flow”.
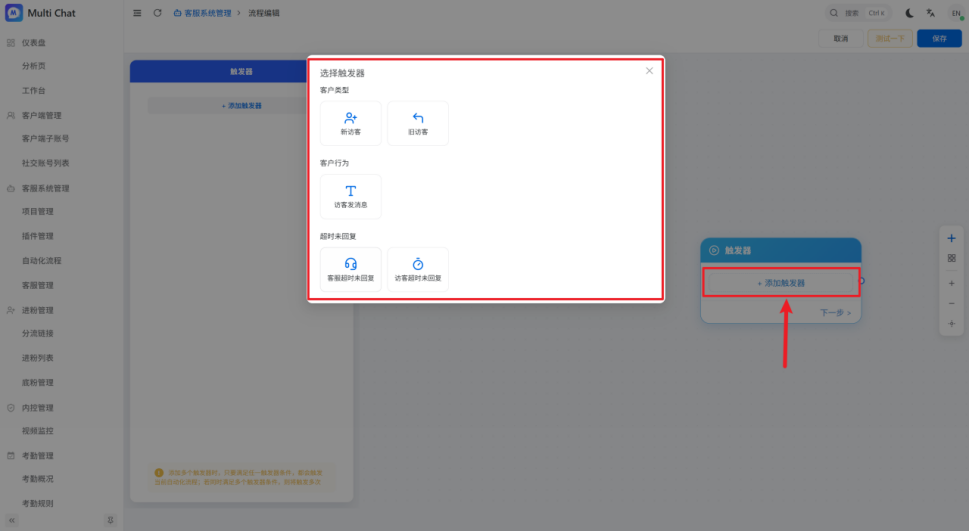
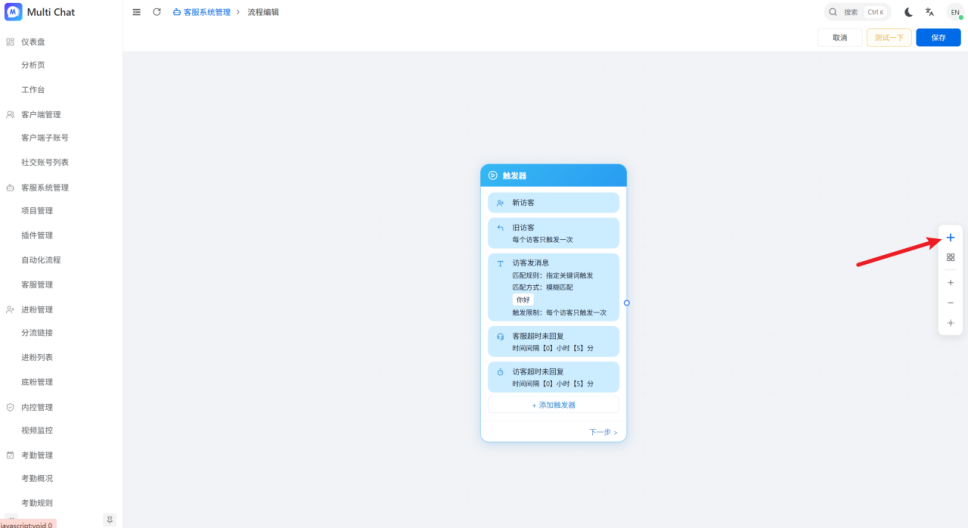
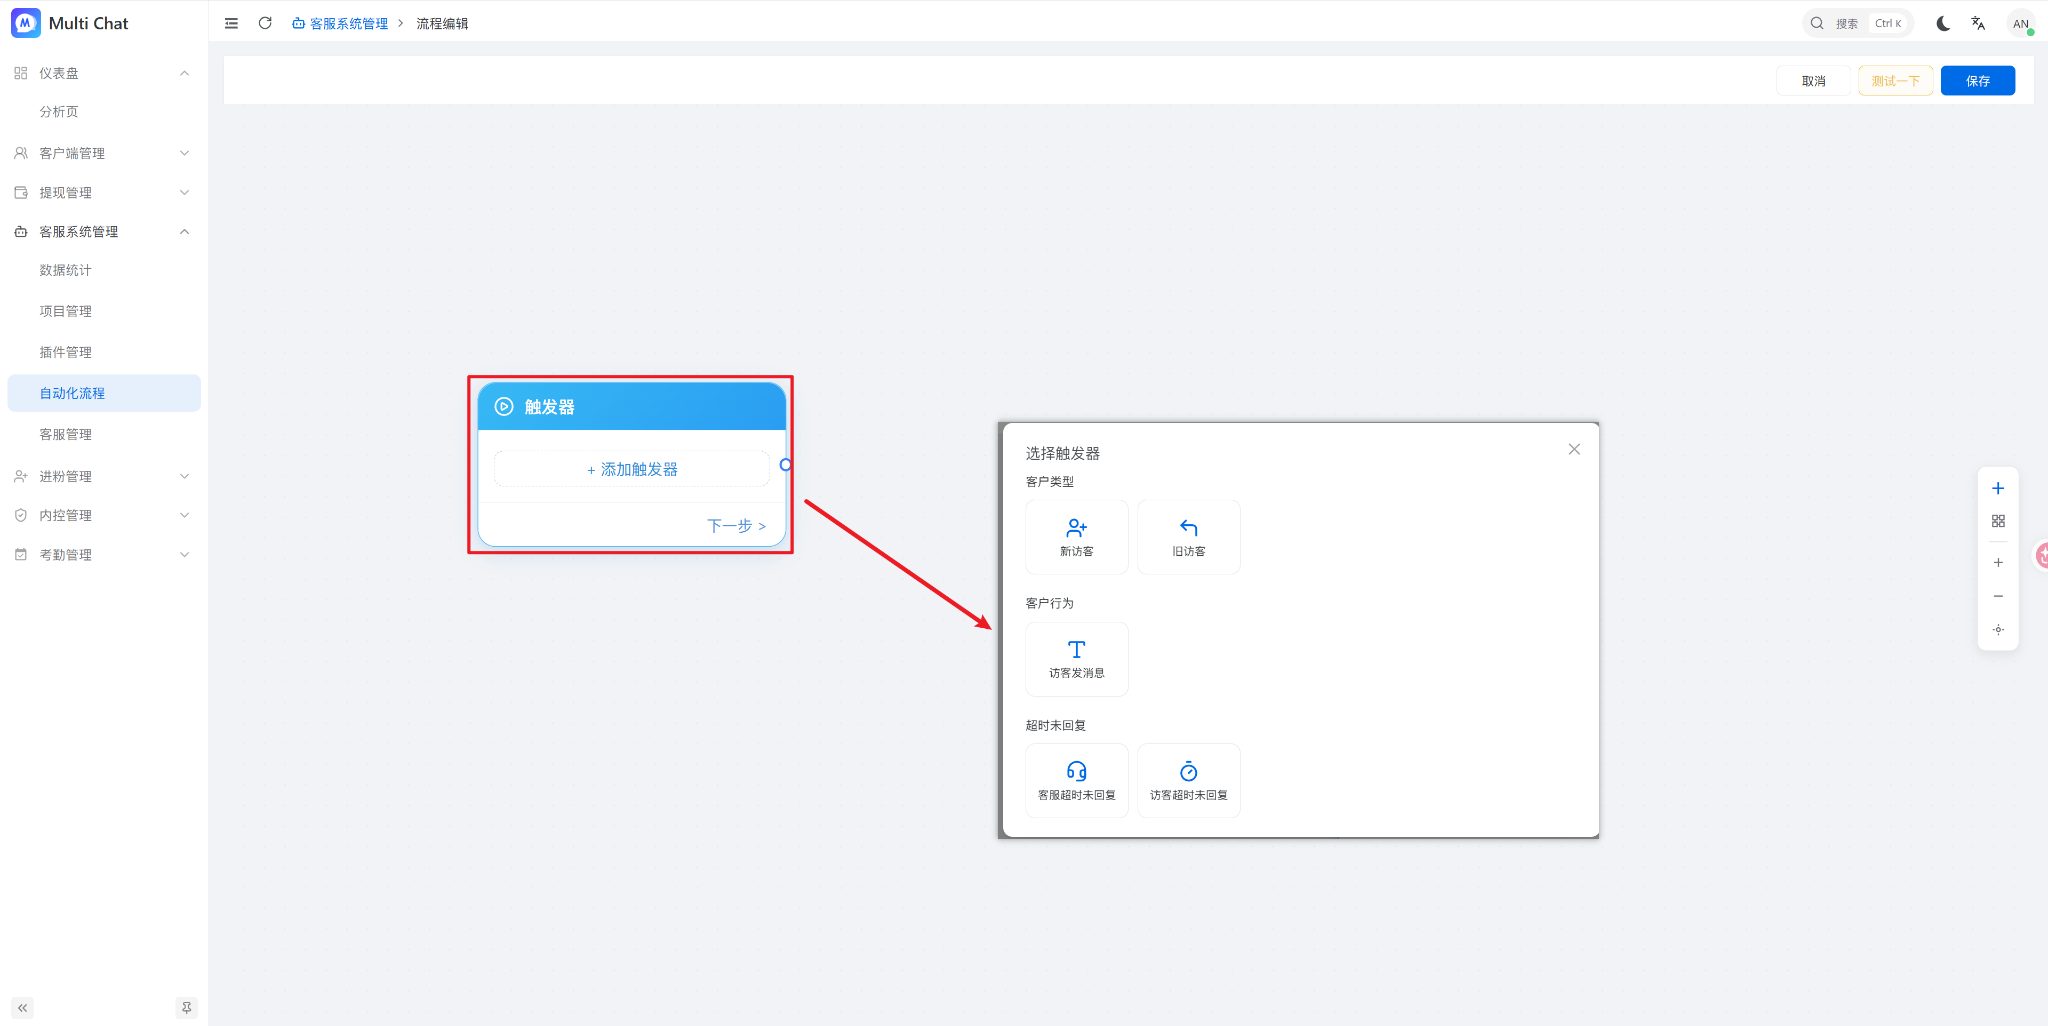
- Add a trigger that defines when the flow starts.
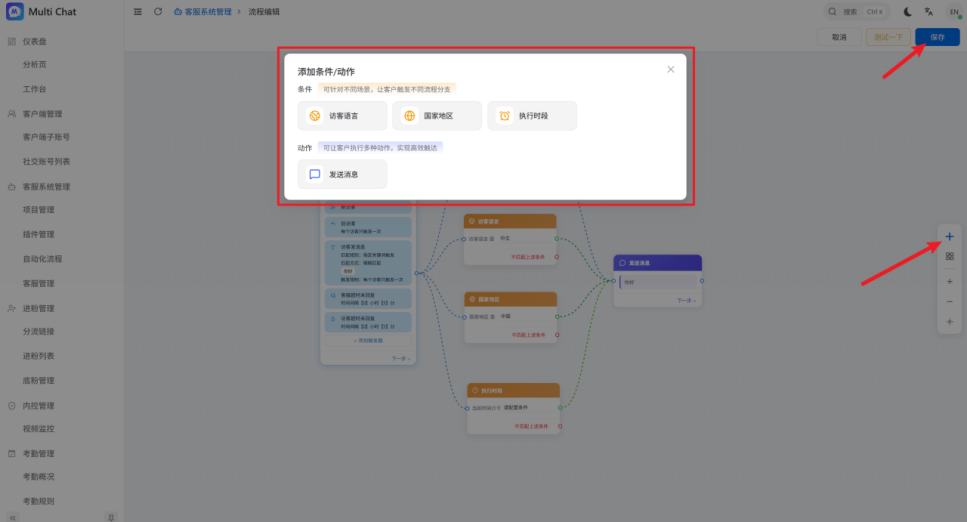
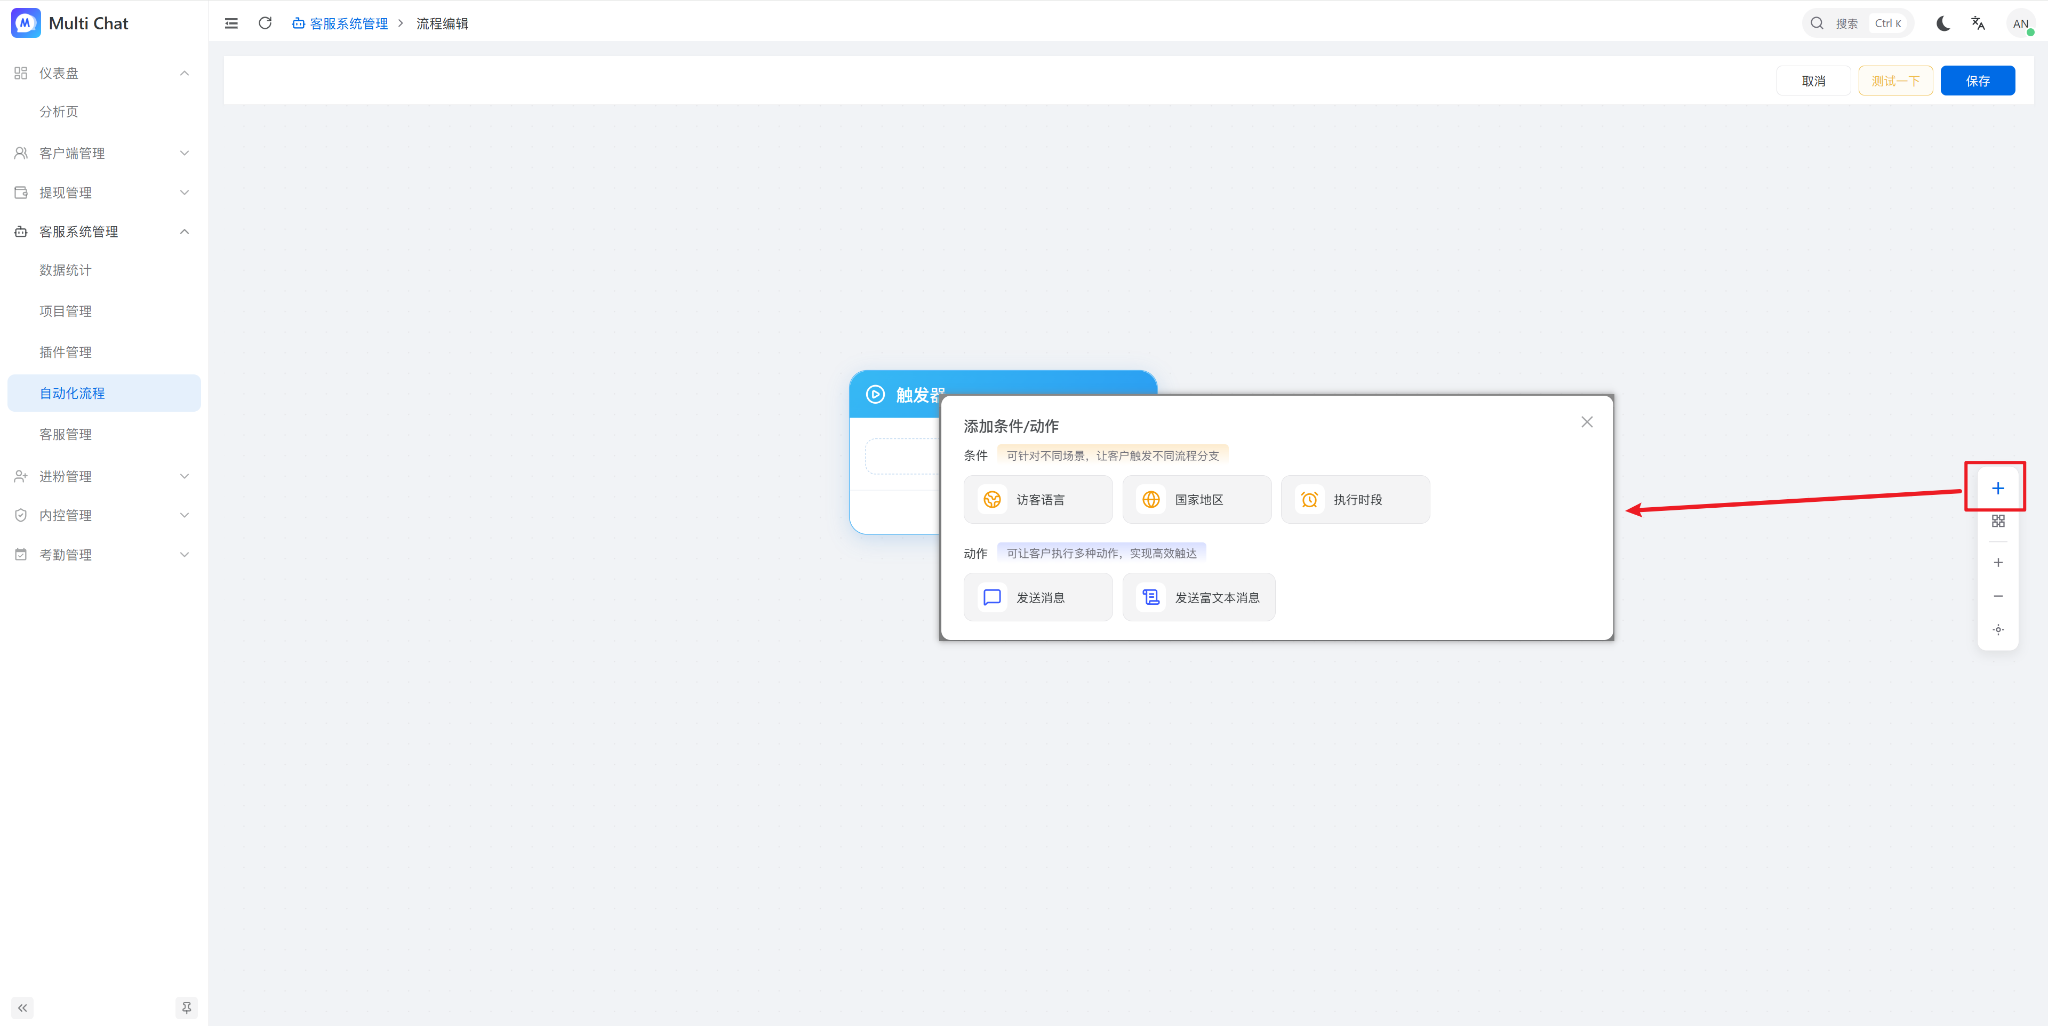
- Add conditions when different scenarios need different paths.
- Add one or more actions, such as sending a message or assigning an agent.
- Enter a flow name and click “Save”.
Understand flow nodes
- Trigger: Starts the flow when an event occurs.
- Condition: Checks customer or conversation data and selects a branch.
- Action: Sends a message, assigns an agent, or performs another operation.
Bind the flow to a channel
After saving, associate the flow with the relevant chat plugin or channel. An unbound flow will not run.
Test before production
Bind the flow to a test plugin first. Verify triggers, messages, and every branch before using it on a production channel.