
Connect QQ Mail
The Email channel lets your team receive and reply to customer emails from the MultiChat workspace.
1. Enable IMAP/SMTP
Sign in to QQ Mail and open “Settings → Account and Security → Security Settings → POP3/IMAP/SMTP/Exchange/CardDAV Services”. Enable the required IMAP/SMTP service.
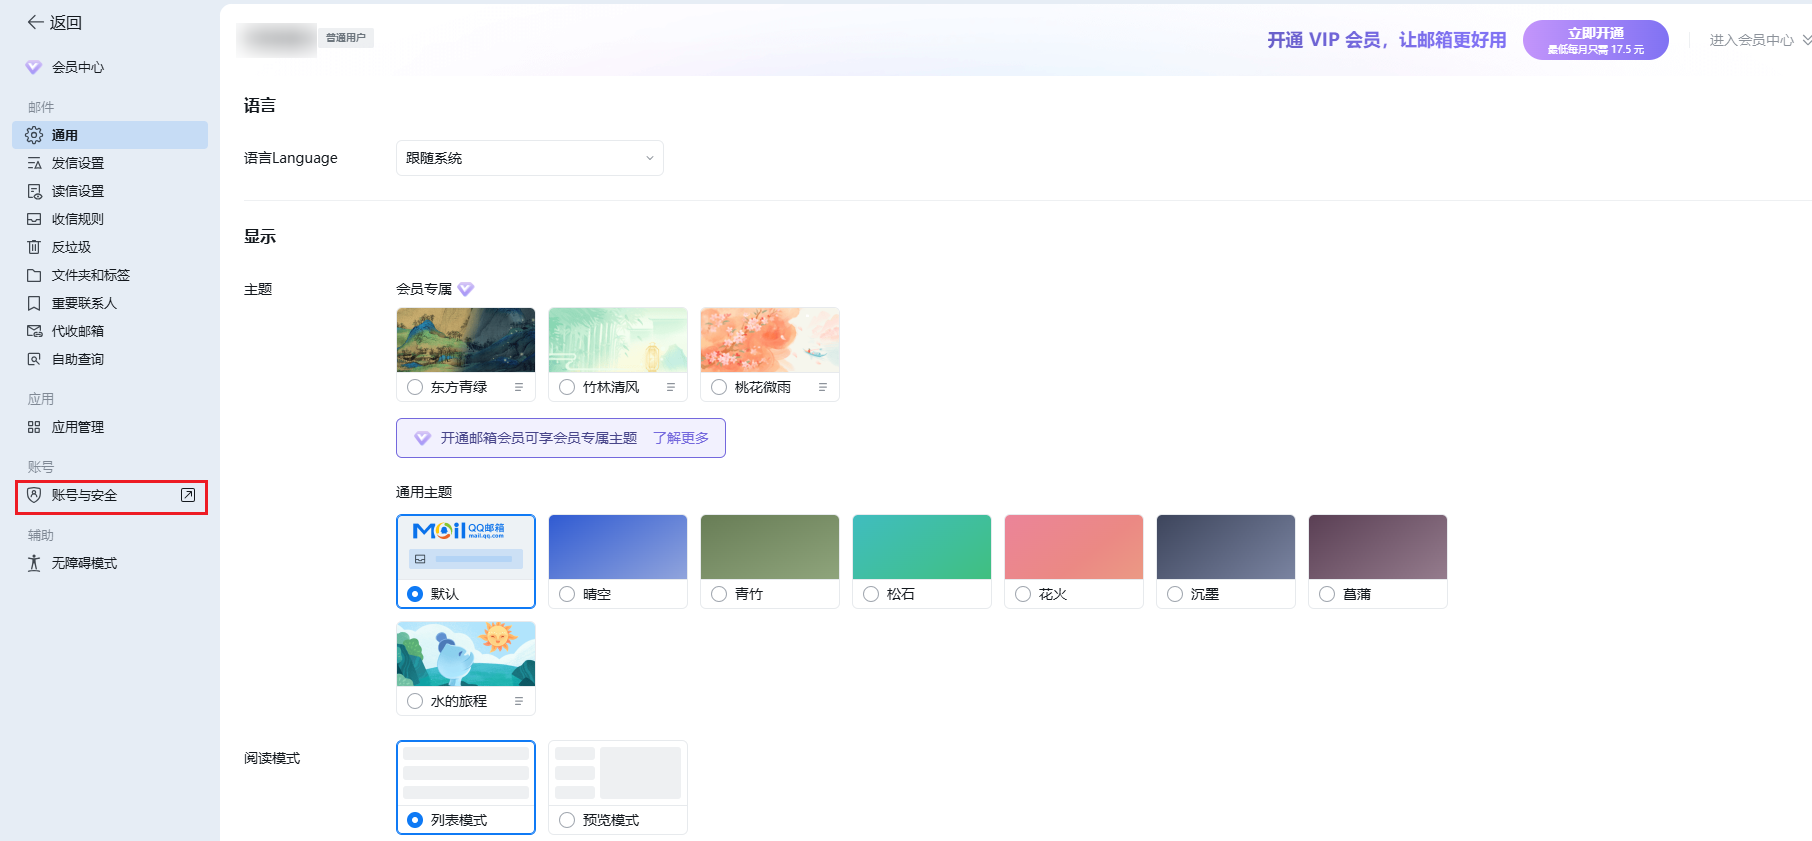
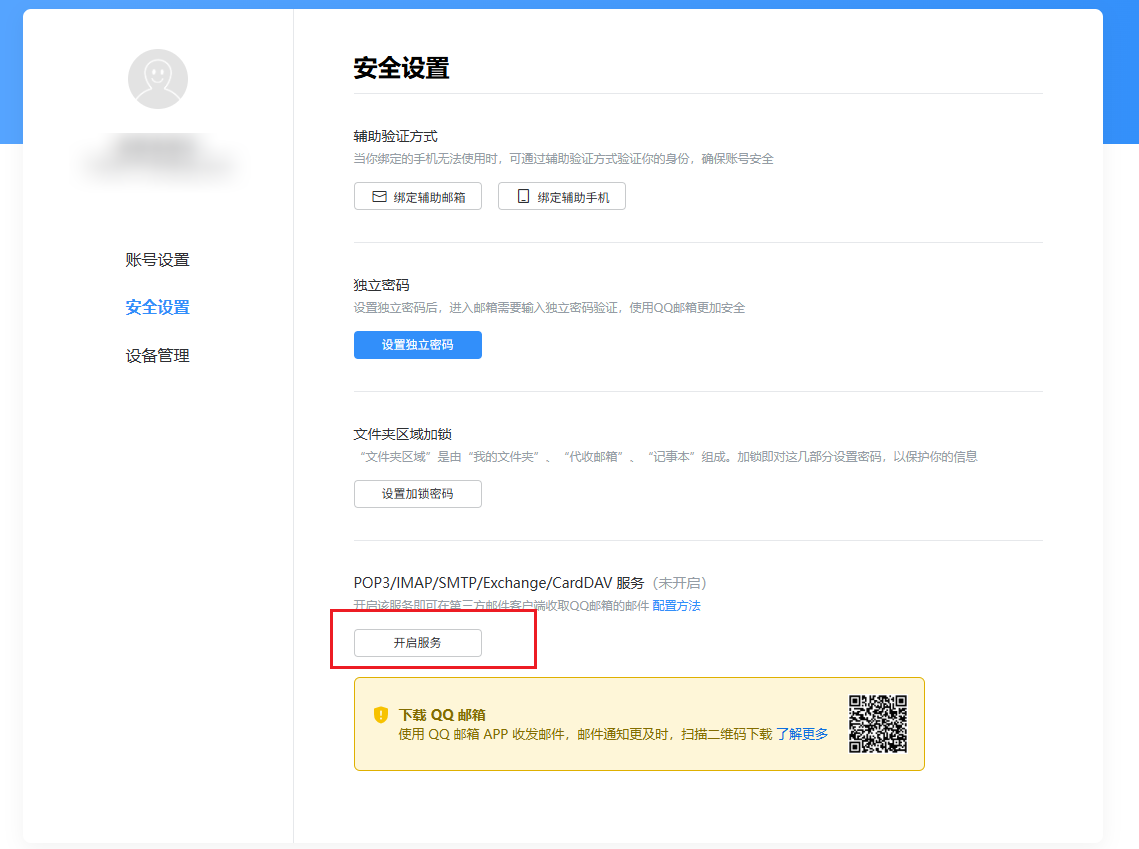
Select a verification method and complete identity verification.
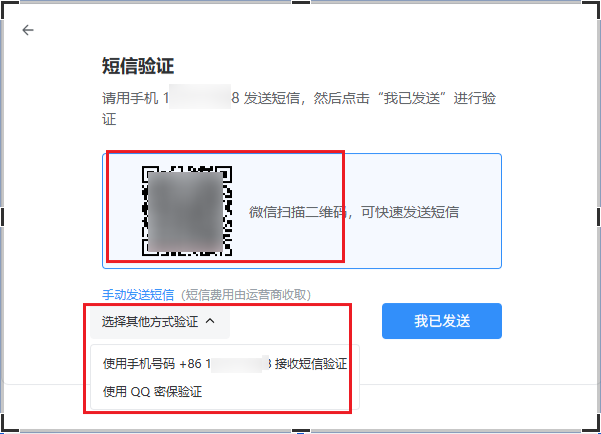
2. Generate an authorization code
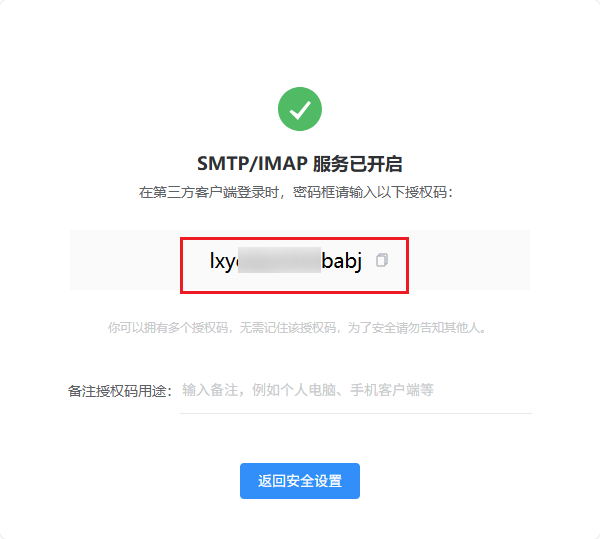
After verification, QQ Mail displays an authorization code. Copy it for the MultiChat connection form. Use this authorization code instead of the mailbox password.
DANGER
The authorization code is sensitive. Never add it to public documentation or share it with unrelated people.
3. Add the Email channel
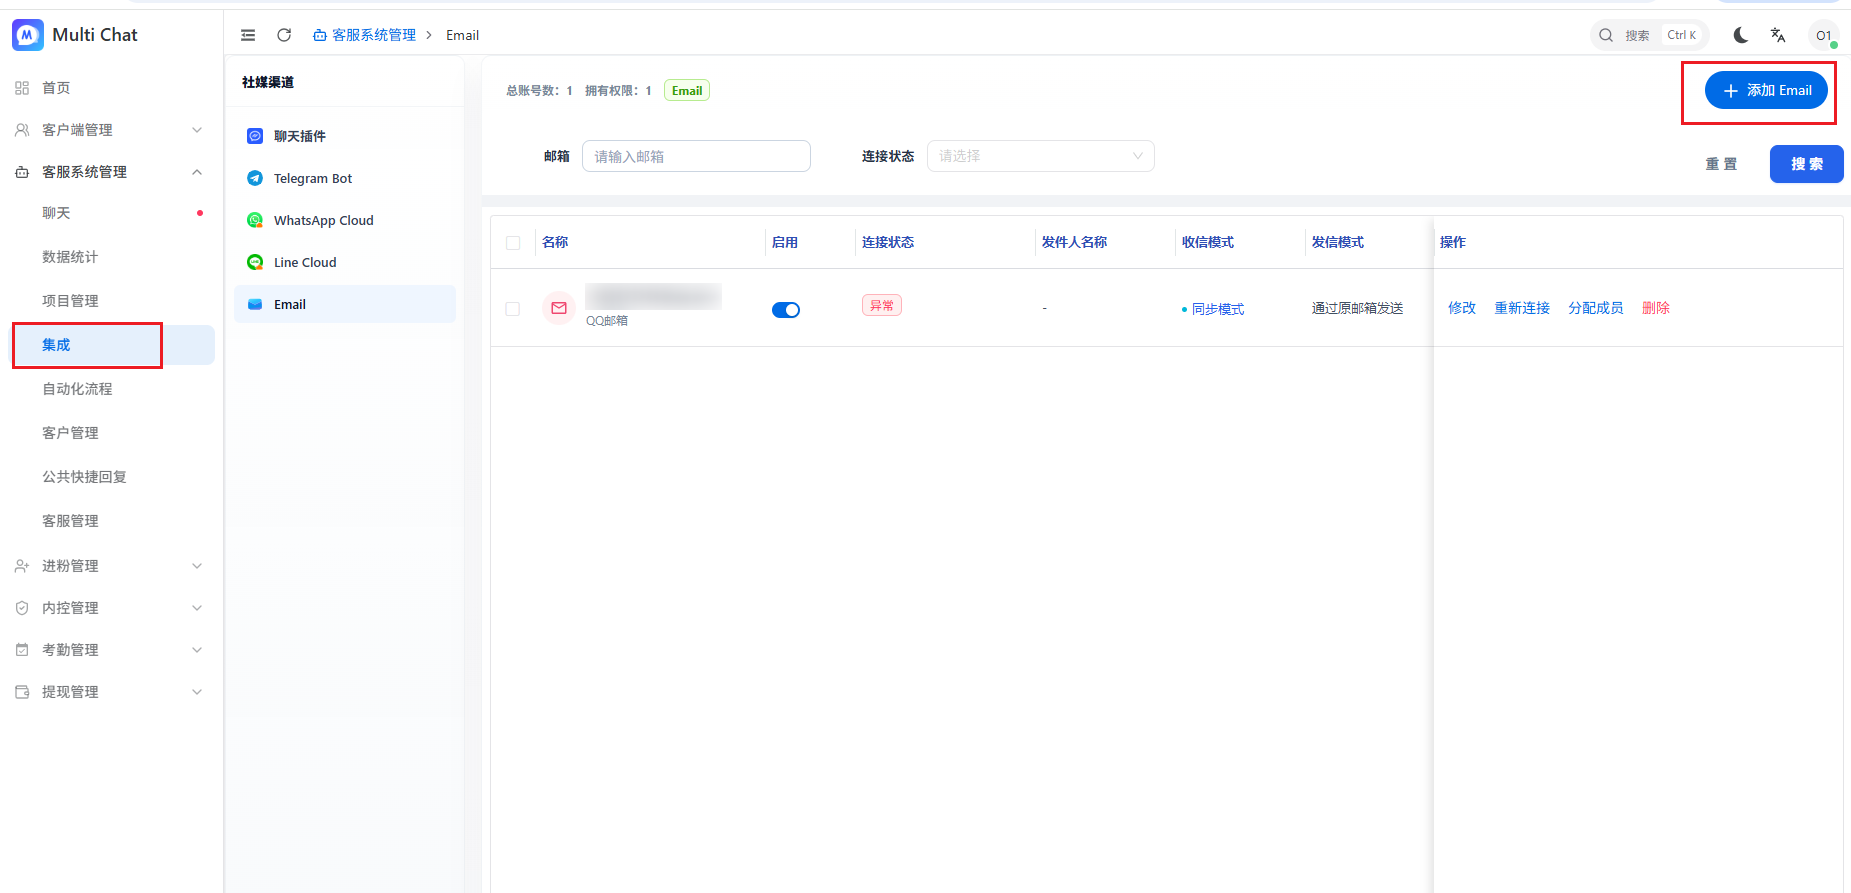
- Go to “Customer Service Management → Integrations → Email”.
- Click “Add Email”.
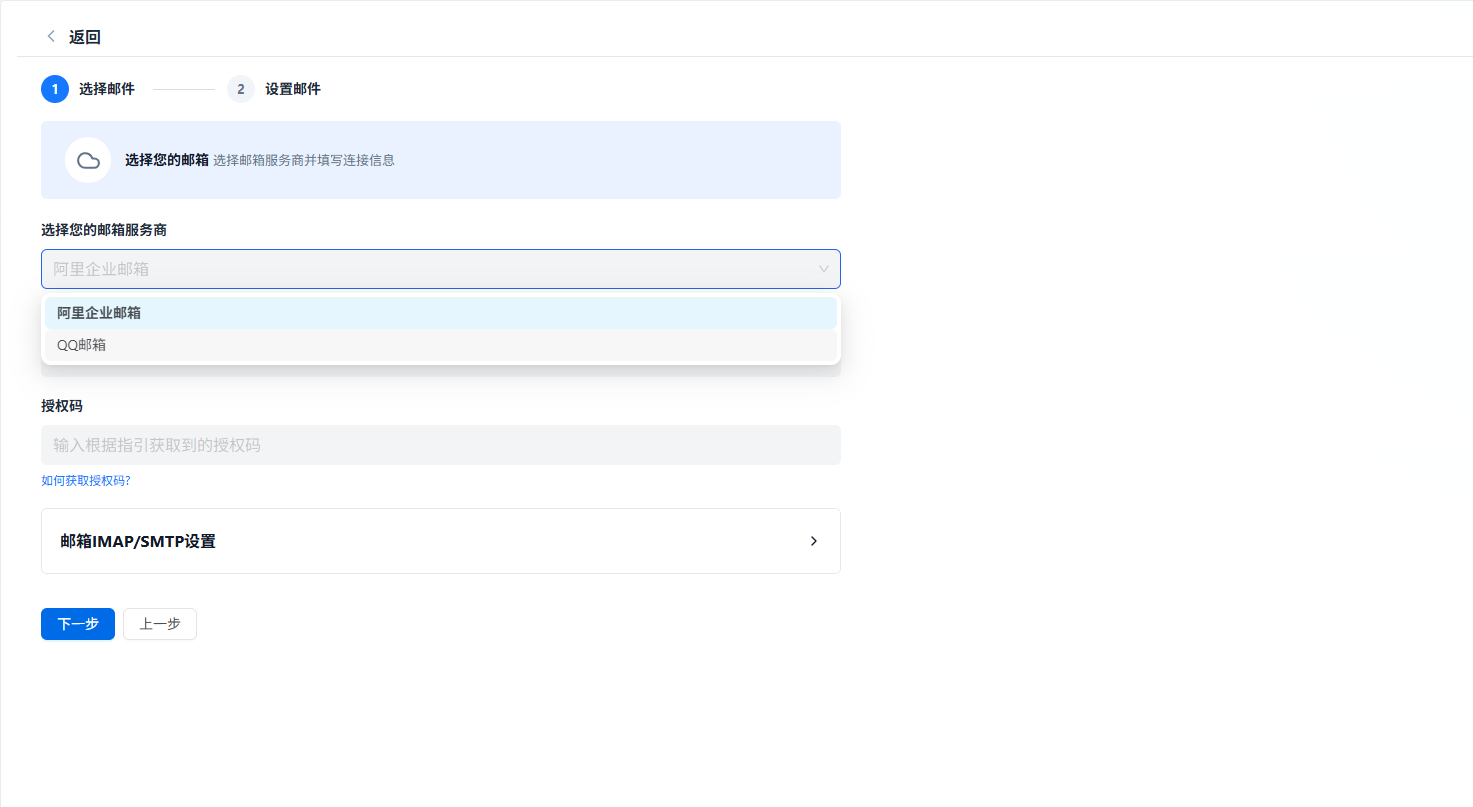
- Select the provider and enter the address, authorization code, and required server settings.
- Click Next, test the connection, and save.
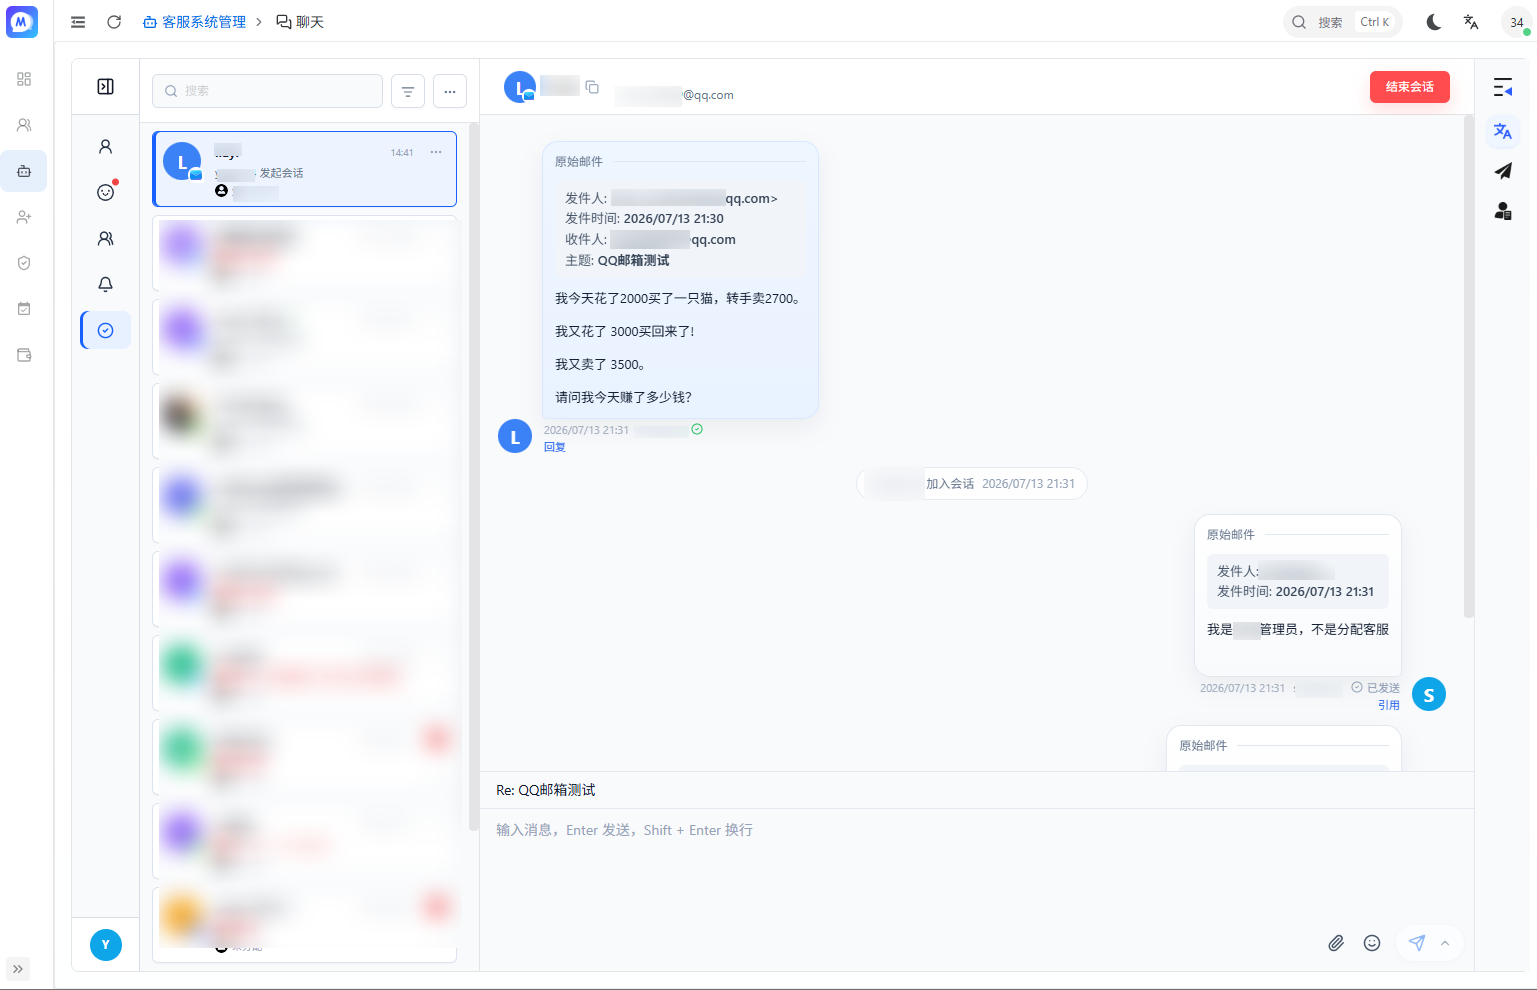
New email now appears in the Chat workspace, where agents can reply directly.
4. Manage the mailbox
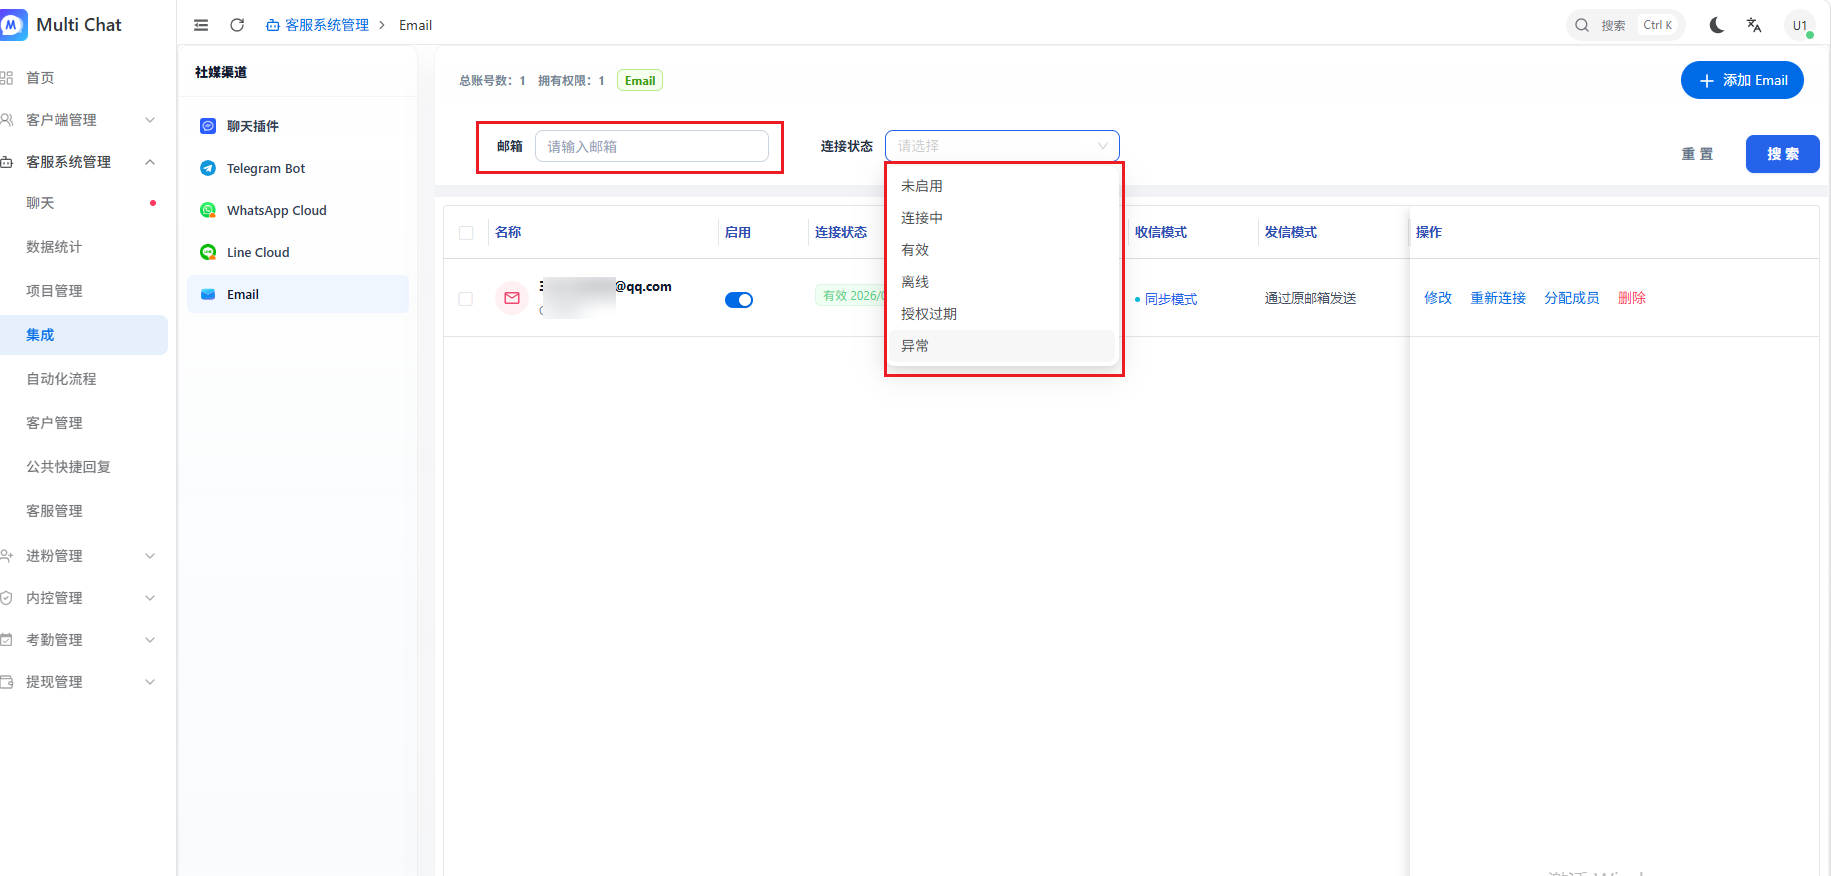
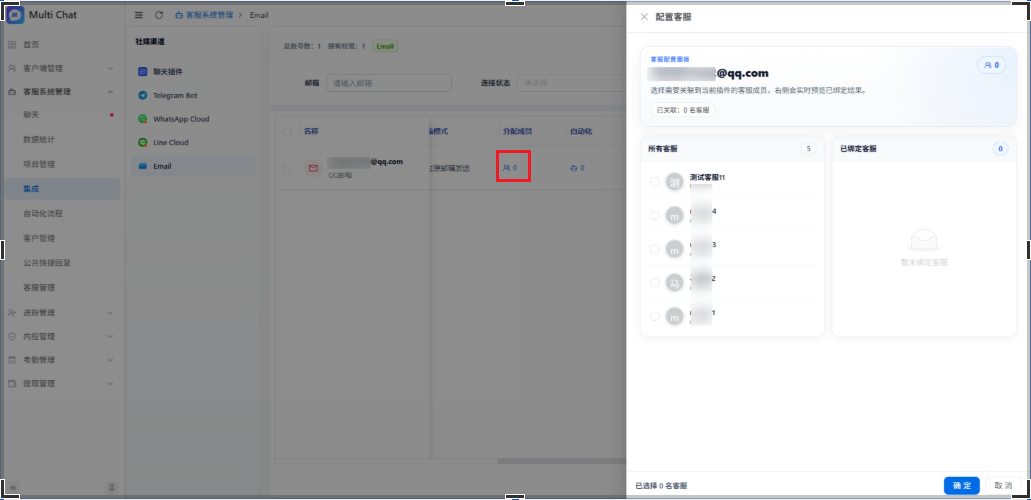
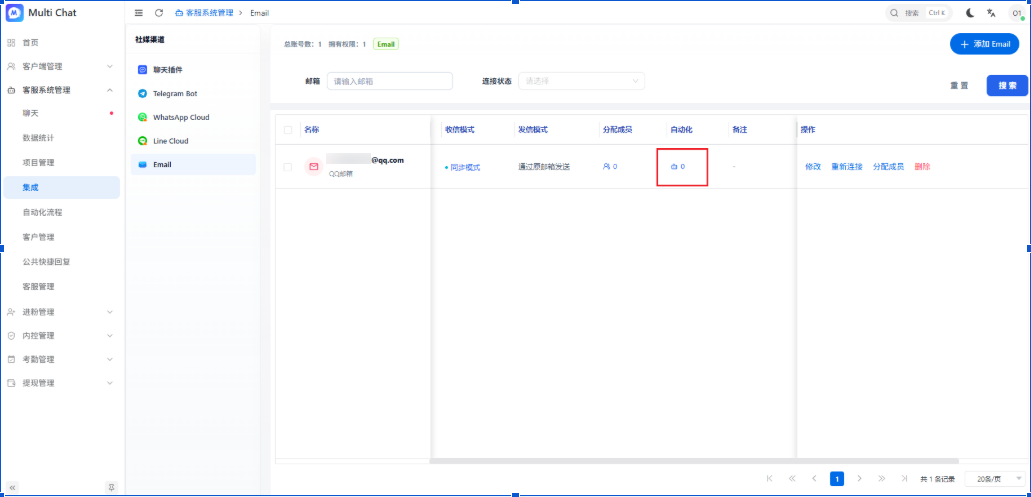
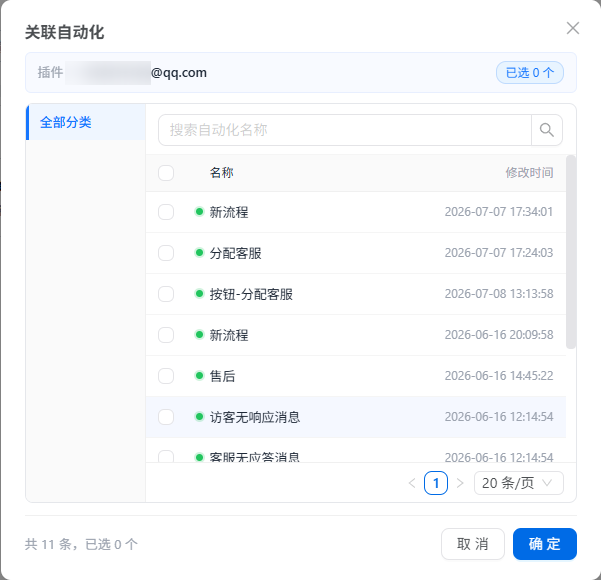
Search by address or connection status, assign agents, and associate automation flows.
Connection expired
Changing the mailbox password or authorization code can interrupt synchronization. Update the credentials in MultiChat and reconnect the mailbox.